Deerfield in Vernon County, Missouri — The American Midwest (Upper Plains)
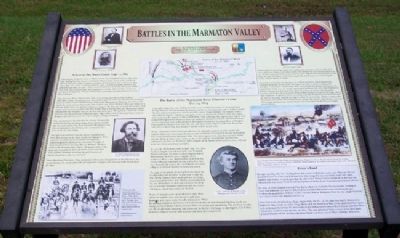
Battles in the Marmaton Valley
A State Divided: The Civil War in Missouri
Action at Dry Wood Creek, Sept. 2, 1861
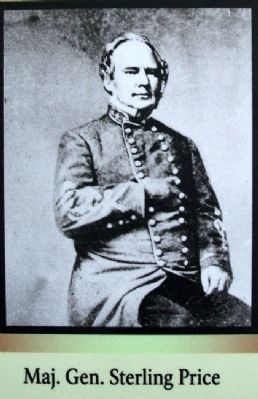
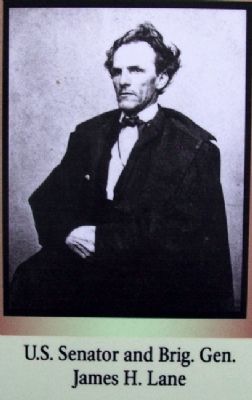
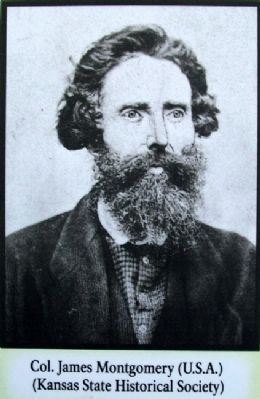
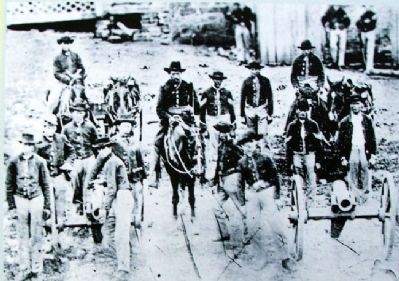
Following the Southern victory at Wilson's Creek near Springfield (Aug. 10, 1861), Maj. Gen. Sterling Price led the pro-Confederate Missouri State Guard, which numbered about 10,000 men, north to capture Lexington. He detoured to attack Fort Scott, Kan., where Brig. Gen. and U.S. Senator James H. Lane, a notorious Kansas marauder, had gathered 2,500 men. On Sept. 1, Price concentrated south of Nevada. His scouts raided Fort Scott, which alerted Lane, who prepared to evacuate. Early on Sept. 2 Lane sent Col. James Montgomery with 450 cavalry and a 12-pounder mountain howitzer to slow Price's advance.
That afternoon Price's Missourians, now 12,000 strong, march on Fort Scott in a three-mile column. Around 4:30 p.m. their advance guard crossed Dry Wood Creek at Hogan's Ford two miles south of Deerfield and collided with Montgomery's Kansans, who drove them across the creek and onto the prairie. Price rushed Capt. Hiram Bledsoe's three-gun battery to a hill east of the creek and deployed infantry in support. The Kansans occupied the wooded creek bottom and opened a rapid fire with their Sharps breech-loading rifles; the Missourians replied with muskets and shotguns from the six-foot-tall prairie grass. Montgomery's efficiently-served howitzer soon silenced most of Bledsoe's guns. Capt. Henry Guibor's four-gun battery came to Bledsoe's aid, but took losses and was in danger of being outflanked.
Price was forced on the defensive; the volume of enemy fire convinced him that he faced a larger force than he actually did. He reinforced his line, then advanced. Montgomery was low on ammunition; he fell back, then retreated to Fort Scott as the sun was setting.
The fight had lasted less than two hours. Casualties had been light because of the thick woods and high grass. Price reported two killed and 23 wounded; Montgomery acknowledged five killed and six wounded. The sight of these casualties had a moving effect on Robert S. Bevier, a major in the Missouri State Guard: "We passed some of the dead and wounded, the first sad results of real war I had seen and the solemnity attending the awful mystery of mortal dissolution crept over my soul."
Lane abandoned Fort Scott. Price declined to follow, since his goal was to free Missouri, not invade Kansas. He continued north and captured Lexington, but was eventually forced from the state.
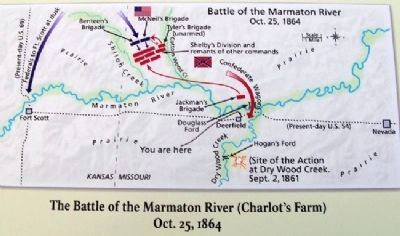
The Battle of the Marmaton River (Charlot's Farm)
Oct. 25, 1864
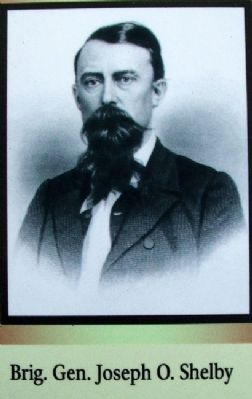
In the fall of 1864, Maj. Gen. Sterling Price led 12,000 Confederate cavalry on an ill-fated raid through Missouri. He was defeated at Westport on Oct. 23, then pursued south by Federal cavalry. The demoralized Confederates were hindered by a train of approximately 500 wagons, loaded with captured supplies. Disaster struck again on Oct. 25. Nearly hafl of Price's army was routed while protecting the wagons as they crossed Mine Creek in Kansas. The fugitives and wagons were pursued throughout the afternoon, their trail marked by discarded weapons, abandoned horses, and burning farms. Late in the afternoon, the wagons reached the Marmaton River at Douglass Ford, a mile northeast of Deerfield, Mo., the only place where wagons could cross. To save his train, Price ordered Brig. Gen. Joseph O. Shelby to slow the pursuers.
Shelby commanded Price's only intact division. He selected a position on a low prairie hill between Shiloh and Cottonwood Creeks six miles northwest of Douglass Ford and deployed his best troops behind fences and stone walls. They were supported by units that had been rallied after the defeat at Mine Creek. In the woods on his right, he concealed the unarmed but enthusiastic recruits of Col. Charles Tyler's brigade. In all, Shelby had about 8,000 men, although most were demoralized and unreliable.
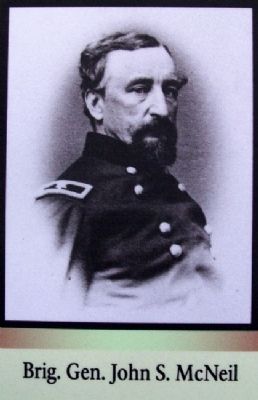
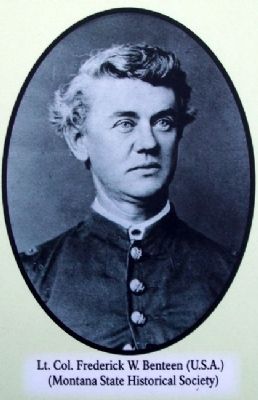
At 3:30 p.m. the Federals came in sight. Brig. Gen. John McNeil's brigade led, followed by Lt. Col. Frederick Benteen's brigade; the other Federal brigades trailed miles behind. McNeil's weary brigade, which numbered about 1,000, deployed 800 yards from the enemy. Although
outnumbered and outflanked, they were flushed with victory; the Confederates were near collapse, so McNeil ordered an immediate attack.
The sight of the grimly advancing Federals threw the Confederates into disorder. To gain time to rally his line, Shelby ordered Tyler's unarmed men to charge, which forced McNeil to halt. Shelby counterattacked, but was driven back by shell and cannister fire from two 12-pounder mountain howitzers and two 3-inch rifled guns, which had reinforced McNeil.
Benteen's brigade came up on McNeil's right. They advanced together, but were forced to halt when Benteen's men came under friendly artillery fire. When the advance resumed, the horses, exhausted from days of marching and fighting, would not charge, so the Federals halted 300 yards from the enemy and opened fire. The 4th Iowa Cavalry saw the Southerners wavering, and advanced. As Shelby's left began to disintegrate, Col. Sidney Jackman's brigade arrived from reserve and drove the Iowans back.
Price's Raid [Inset]
On Sept. 19, 1864, Maj. Gen. Sterling Price led 12,000 Confederate cavalry into Missouri. He was directed to seize St. Louis and Jefferson City, then ravage Kansas and return south with arms, supplies and recruits. It was hoped that the raid would disrupt Union operations in the East and influence the war-weary North to choose a peace candidate in the November presidential election.
On Sept. 27, Price paused to attack Pilot Knob, where he received a bloody repulse. Finding St. Louis and Jefferson City heavily defended, he moved to Boonville to recruit among the pro-Confederate population. Federal cavalry hounded him to Westport, where he was caught between two Union armies and defeated on Oct. 23.
Price fled south, shepherding a huge wagon train. On Oct. 25, his army was nearly destroyed in battles at Mine Creek, the Little Osage River, and the Marmaton River. Price destroyed his wagons and continued to retreat. His demoralized and disheartened men suffered disease and starvation before they reached Texas on Nov. 28, 1864. The raid did divert Union troops from other hard pressed theaters of the war but otherwise failed to achieve any of Price's strategic objectives.
Erected by Missouri Department of Natural Resources.
Topics and series. This historical marker is listed in these topic lists: Patriots & Patriotism • War, US Civil. In addition, it is included in the Missouri - A State Divided: The Civil War in Missouri series list. A significant historical date for this entry is September 2, 1762.
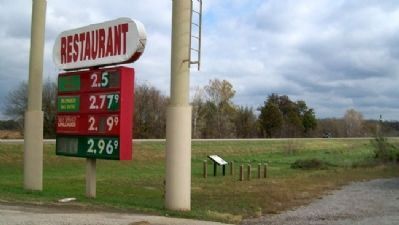
Location. 37° 50.439′ N, 94° 30.05′ W. Marker is in Deerfield, Missouri, in Vernon County. Marker is at the intersection of U.S. 54 and Old U.S. 54, on the right when traveling east on U.S. 54. Marker is adjacent to the convenience store/gas station parking lot. Touch for map. Marker is at or near this postal address: 7490 East US Highway 54, Deerfield MO 64741, United States of America. Touch for directions.
Other nearby markers. At least 8 other markers are within 8 miles of this marker, measured as the crow flies. Theophilus Lambert Ashbaugh (approx. 5.7 miles away); Original Site of Cooper College (approx. 5.8 miles away); Cottey College International Scholarship (approx. 7.1 miles away); Veterans Memorial (approx. 7.7 miles away); Vernon County's Southern Heritage (approx. 7.8 miles away); Bushwhacker Museum (approx. 7.8 miles away); The Battle of Drywood (approx. 7.8 miles away); The Burning of Nevada (approx. 7.8 miles away).
Related marker. Click here for another marker that is related to this marker.
Also see . . .
1. Battle of Dry Wood Creek. Wikipedia entry (Submitted on September 21, 2023, by Larry Gertner of New York, New York.)
2. Battle of Marmaton River. Civil War on the Western Border website entry (Submitted on September 21, 2023, by Larry Gertner of New York, New York.)
3. Sterling Price. American Battlefield Trust website entry (Submitted on September 21, 2023, by Larry Gertner of New York, New York.)
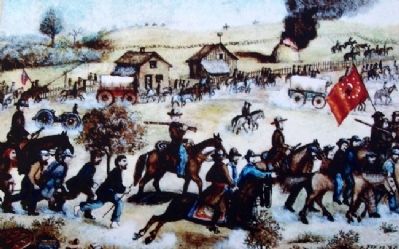
Photographed By Samuel Reader, circa 1864
7. Painting on Marker
[Caption reads] Samuel Reader of the Kansas State Militia was captured near Westport on Sept. 22, 1864. He painted this picture of Union prisoners being hurried south by the fleeing Confederates. Reader escaped in the confusion following the battle of the Marmaton River. (Kansas State Historical Society)
Credits. This page was last revised on September 21, 2023. It was originally submitted on January 22, 2011, by William Fischer, Jr. of Scranton, Pennsylvania. This page has been viewed 1,815 times since then and 41 times this year. Photos: 1, 2, 3, 4, 5, 6, 7, 8, 9, 10, 11. submitted on January 22, 2011, by William Fischer, Jr. of Scranton, Pennsylvania.
