Walloomsac in Rensselaer County, New York — The American Northeast (Mid-Atlantic)
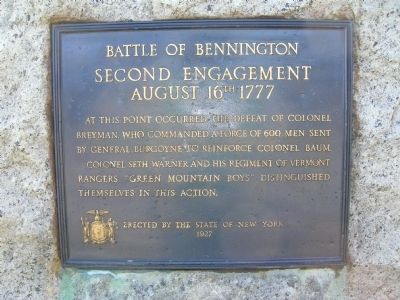
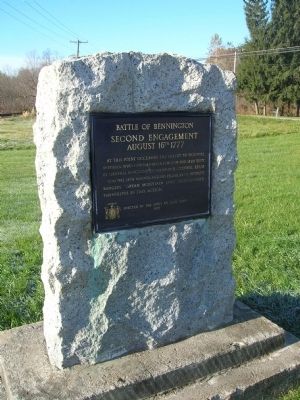
Battle of Bennington
Second Engagement
— August 16th 1777 —
Inscription.
At this point occurred the defeat of Colonel
Breyman, who commanded a force of 600 men sent
by General Burgoyne to reinforce Colonel Baum.
Colonel Seth Warner and his regiment of Vermont
Rangers "Green Mountain Boys" distinguished
themselves in this action.
Erected 1927 by The State of New York State.
Topics. This historical marker is listed in this topic list: War, US Revolutionary.
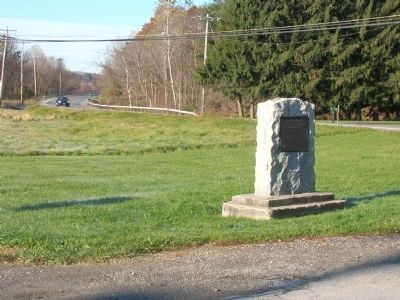
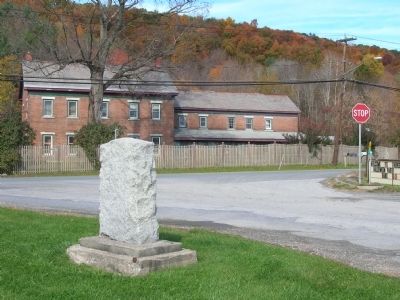
Location. 42° 55.469′ N, 73° 19.401′ W. Marker is in Walloomsac, New York, in Rensselaer County. Marker is at the intersection of Corttrell Road and New York State Route 67, on the right when traveling south on Corttrell Road. Marker is easily seen from Route 67, and is located bewteen the railroad tracks and Route 67. Touch for map. Marker is in this post office area: Hoosick Falls NY 12090, United States of America. Touch for directions.
Other nearby markers. At least 8 other markers are within 2 miles of this marker, measured as the crow flies. Battle of Bennington Second Engagement (a few steps from this marker); Lakes to Locks Passage (approx. one mile away); Hoosick World War II Memorial (approx. 1.1 miles away); a different marker also named Battle of Bennington (approx. 1.1 miles away); Battle of Bennington First Engagement (approx. 1.1 miles away); Bennington Battlefield (approx. 1.1 miles away); Vermont Rangers (approx. 1.3 miles away); Massachusetts Volunteers at Bennington (approx. 1.4 miles away). Touch for a list and map of all markers in Walloomsac.
More about this marker. 1927 was one hundred and fifty years after the events that took place in 1777.
Regarding Battle of Bennington.
As General Burgoyne's army advanced from the north, refugees started to stream into the Bennington area. With growing concern, the citizens of Bennington sent out a call for help to New Hampshire and Massachusetts. A militia force under the command of General John Stark soon arrived from New Hampshire while militia companies and small groups of men continually arrived from the hills of western Massachusetts. Though the Green Mountain Boys, now a unit in the Continental Army, stayed in Manchester, their leader, Seth Warner, came to Bennington to help in the defense.
General Stark, the most senior officer on the field, received his commission as general directly from the New Hampshire legislature. After serving valiantly at Bunker Hill and the Battle of Trenton,
Stark was passed over for promotion by the Continental Congress. Rather than continue to serve, he retired to his farm in New Hampshire. When the call came for help, he agreed to serve as long as his directives came from New Hampshire, not the Continental Congress.
Much of Burgoyne's army was made up of German troops, hired by King George III by treaty from various German states such as Hesse (Hessians) and Brunswick. The majority of troops that marched on Bennington, including their colonel, were Brunswick Dragoons. Aiding them were two Hessian artillery crews, Mohawk Indian, British infantry, Canadian volunteers, and a number of loyalists commanded by Francis Pfister of Hoosick, New York.
As Stark set up camp in and around Bennington, Colonel Baum and his mixed forces pushed down the Bennington road (now route 67) towards Cambridge. After a brief skirmish with American troops at Cambridge on the morning of the 13th of August, Baum moved on to SanCoick, now North Hoosick, New York. On the morning of the 14th, Baum entered SanCoick and engaged a scouting party of Americans under Colonel William Gregg who were in the area investigating reports of Indian activity. After taking the SanCoick mill, and passing the plundered stores back to Burgoyne, he continued his march. Gregg quickly informed the main American army, already on the march, that a British army was
close at hand. Stark drew his army up for battle on the ridges east of SanCoick and waited for Baum. By noon the armies faced each other, but rather than risk attacking a well-positioned foe, Baum entrenched his troops on the opposing hills.
Nervous about the American forces, Baum wrote to Burgoyne requesting reinforcements. Through the night he worked on his defensive position while Stark withdrew a few miles to await more troops and gather information. Continuous rain on the 15th kept Stark from attacking, allowed Baum to further entrench his forces.
Though sources vary, it is estimated that Colonel Baum commanded between 1,000 and 1,200 troops while General Stark opposed him with between 1,800 and 2,000 Americans.
When Colonel Baum's request for reinforcements arrived, General Burgoyne sent a detachment of 642 soldiers and two cannons under Colonel Heinrick Breymann in relief. However, the rain that delayed Stark's attack one day and allowed Baum to build better defenses also created muddy roads that slowed Breymann's advance. On the morning of the battle Breymann's force was still almost a full day's march away.
With the morning of August 16th dawning clear and dry, Stark decided to put his attack plan into action. He sent a detachment of New Hampshire militia under Colonel Moses Nichols on
a wide flanking march to the north of Baum's position while a mixed force under the command of Colonel Samuel Herrick marched around Baum's position to the south. To cover this encircling maneuver, Stark detailed 100 men to keep the British attention. When, in the late afternoon, Nichols and Herrick started their attack from the rear, Stark took the remainder of his force and attacked straight down the road at the front of the British position. A small force broke off this frontal attack and engaged the Tory troops positioned to the south of the road.
With surprise and an overwhelming numerical advantage of two to one, Stark easily overran the British position. Most attacks involved one volley and then a charge into the trenches. In a short time the battle was over and the British forces were either captured or dead. Colonel Baum and the Tory commander Colonel Francis Pfister, both received wounds that would end their lives.
In the aftermath of the battle, the American troops became scattered and divorced from their units. Some chased the beaten British forces, while others attended to the wounded. The prisoners were rounded up and troops were detailed to send them back to Bennington. In all of this disorder Breymann's relief column finally arrived on the scene.
A small group of Americans, chasing the defeated soldiers, stumbled upon this disciplined
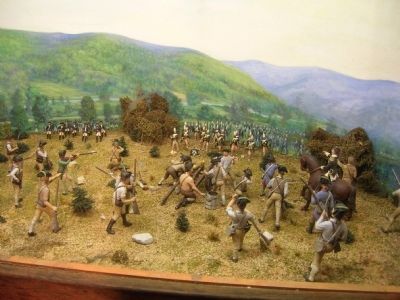
Photographed By Howard C. Ohlhous, November 24, 2008
5. Second Engagement Diorama
A display on the ground floor withing the Bennington Battle Monument in Bennington is this diorama. In 1964, the State of Vermont commissioned Paul V. Winters, a Vermont artist, to construct a diorama depicting the Second Engagement of the hard-fought Bennington Battle. This fine work, in full color, is historically accurate, the detail well authenticated by research.
Camped in Manchester, the Green Mountain Boys were recovering from their losses at Hubbardton when the call for help at Bennington came. Riding ahead, Seth Warner took part in the first phase of the battle and, as the second British attack beat down, he exhorted the tired Americans to stand and wait for the troops from Manchester to arrive. Though small in number, these battle hardened troops stiffened the American line and resolve. Soon the superior American numbers came to bear on Breymann's force, and as the Americans pressed forward, the British started to fall back in good order. With victory again in their sights, the Americans charged and turned the well ordered retreat in an all out rout. Only the coming of night saved Breymann's force from the same fate as Baum's.
Also see . . . The Battle of Bennington: An American Victory. (Submitted on November 28, 2008, by Howard C. Ohlhous of Duanesburg, New York.)
Additional keywords. American Revolution
Credits. This page was last revised on July 23, 2020. It was originally submitted on November 28, 2008, by Howard C. Ohlhous of Duanesburg, New York. This page has been viewed 3,262 times since then and 24 times this year. Photos: 1, 2, 3, 4, 5. submitted on November 28, 2008, by Howard C. Ohlhous of Duanesburg, New York. • Kevin W. was the editor who published this page.
