Marietta in Washington County, Ohio — The American Midwest (Great Lakes)
Sewah Studios
Photographed by Michael Herrick, February 26, 2018
1. Sewah Studios Marker
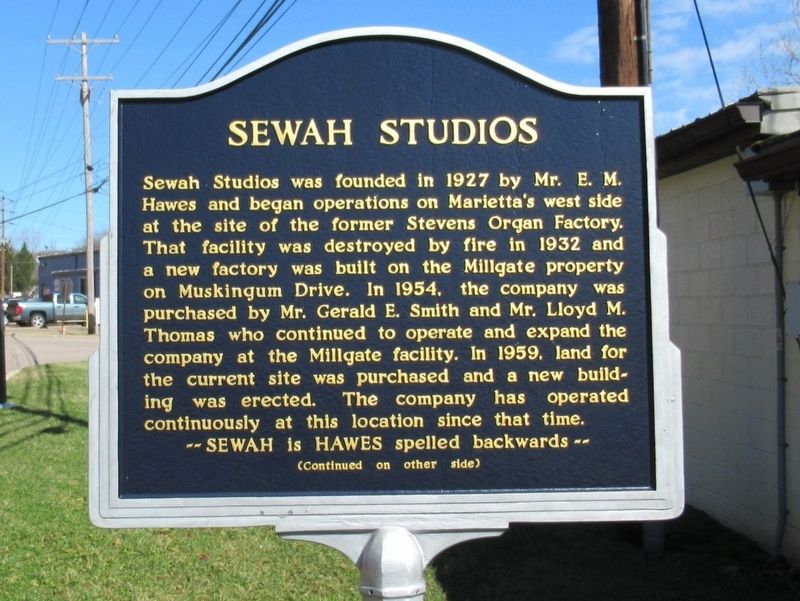
Sewah Studios was founded in 1927 by Mr. E. M. Hawes and began operations on Marietta's west side at the site of the former Stevens Organ Factory. That facility was destroyed by fire in 1932 and a new factory was built on the Millgate property on Muskingum Drive. In 1954, the company was purchased by Mr. Gerald E. Smith and Mr. Lloyd M. Thomas who continued to operate and expand the company at the Millgate facility. In 1959, land for the current site was purchased and a new building was erected. The company has operated continuously at this location since that time.
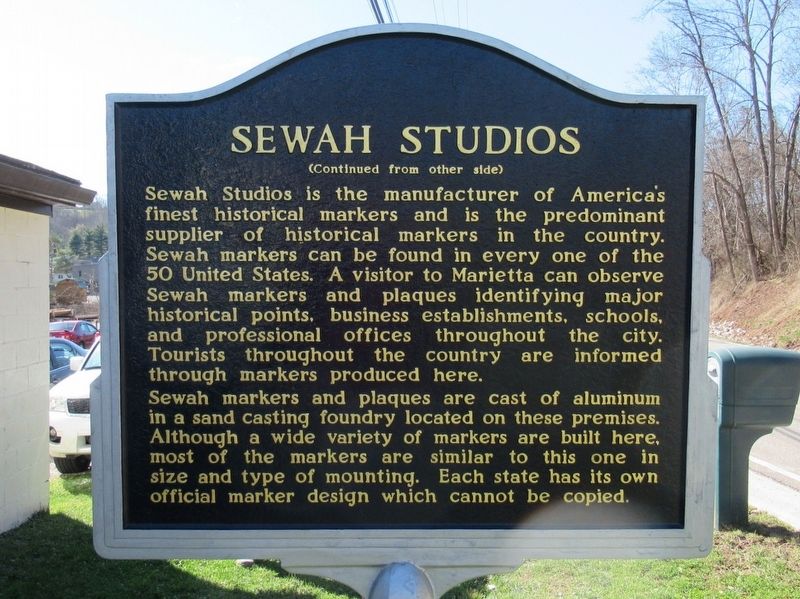
Sewah Studios is the manufacturer of America’s finest historical markers and is the predominant supplier of historical markers in the country. Sewah markers can be found in every one of the 50 United States. A visitor to Marietta can observe Sewah markers and plaques identifying major historical points, business establishments, schools, and professional offices throughout the city. Tourists throughout the country are informed through markers produced here.
Sewah markers and plaques are cast of aluminum in a sand
this page online
Topics. This historical marker is listed in these topic lists: Education • Industry & Commerce. A significant historical year for this entry is 1927.
Location. 39° 26.527′ N, 81° 26.66′ W. Marker is in Marietta, Ohio, in Washington County. It is at the intersection of Mill Creek Road and Colegate Drive, on the right when traveling west on Mill Creek Road. Touch for map. Marker is at or near this postal address: 190 Mill Creek Road, Marietta OH 45750, United States of America. Touch for directions.

Regionally, this marker is in the American Midwest, in the Ohio River Valley, in Appalachia, and specifically in Northern Appalachia. Globally, it is in North America, the Western Hemisphere, the Western World, and the Anglosphere. Historically, it finds itself in what was once the Viceroyalty of New France, the Haudenosaunee (Iroquois) Confederacy, the territory of the Mississippian Culture,
Photographed by Michael Herrick, February 26, 2018
2. Sewah Studios Marker
Other nearby markers. At least 8 other markers are within 2 miles of this marker, measured as the crow flies: Catherine Fay Ewing / Frances Dana Gage (approx. ¾ mile away); Children’s Home (approx. 0.8 miles away); Cisler Terrace (approx. 1½ miles away); Rufus Dawes House (approx. 1.6 miles away); Memorial Garden (approx. 1.6 miles away); Mound Cemetery (approx. 1.6 miles away); Shipman-Mills House (approx. 1.6 miles away); William Pitt Richardson (approx. 1.6 miles away). Touch for a list and map of all markers in Marietta.
Regarding Sewah Studios. Thanks to the staff of Sewah Studios for inviting us to tour their factory and photograph their process of handcrafting markers.
Also see . . .
1. Sewah Studios. (Submitted on March 2, 2018, by Michael Herrick of Southbury, Connecticut.)
2. Signs of our Time: Bradford Smith of Sewah Studios. 2025 podcast (approx. 32 minutes). Dave Laton interviews Bradford Smith, the President of Sewah Studios. (Submitted on July 24, 2025.)
Photographed by Michael Herrick, February 26, 2018
3. Sewah Studios Marker
Photographed by Michael Herrick, February 26, 2018
4. Making the Pattern
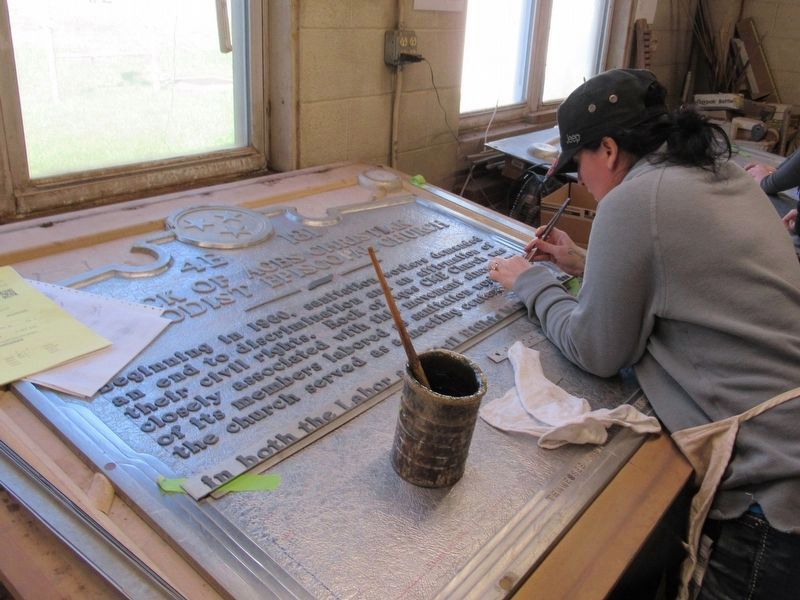
Once the layout of the marker is finalized, letters are individually glued in position on the textured backing board. The glue allows the letters to be removed and reused. After proof-reading and inspection it moves to the foundry area. When ready for casting, it is called a “pattern”.
Photographed by Michael Herrick, February 26, 2018
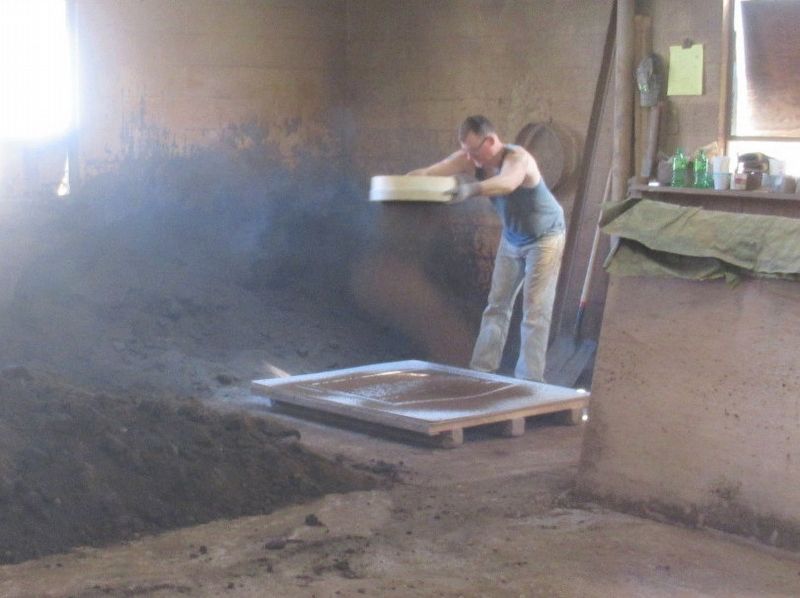
5. Foundry
Fine sand is sifted onto the pattern. Fine sand preserves the details of the textured background, letters and decorative elements.
Photographed by Michael Herrick, February 26, 2018
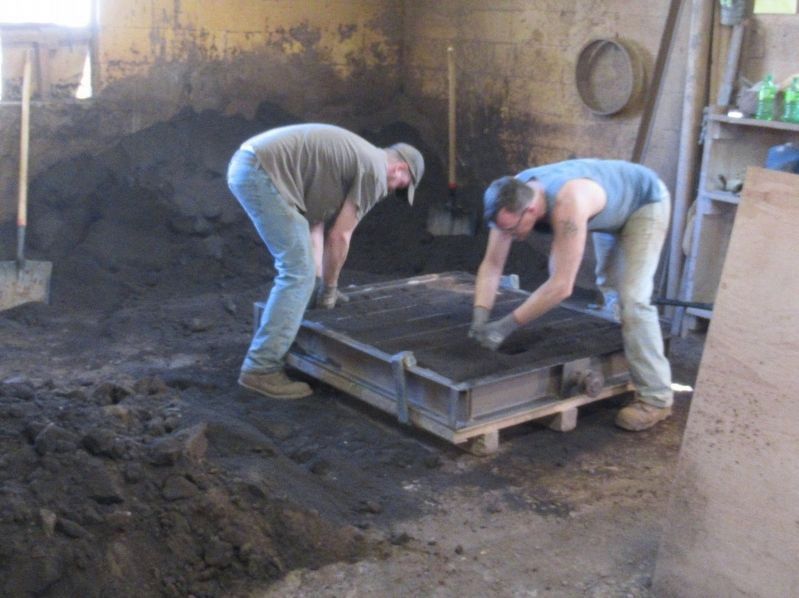
6. Foundry
A frame called a “flask” is placed over the pattern and filled with coarse “green sand”. The green sand is compacted to retain the shape of the pattern. After compacting, the flask is flipped over and the pattern removed. The process is repeated with another flask for the reverse side.
Photographed by Michael Herrick, February 26, 2018
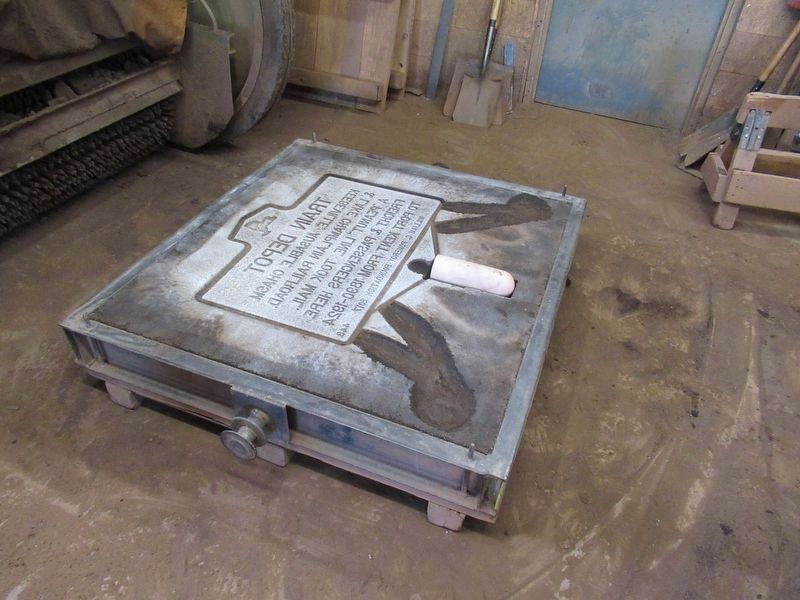
7. Ready for the Other Side
Here is one face of a marker after the pattern has been carefully lifted out. All letters and decorative elements of the pattern will be reused. The flask for the reverse side will be mated to this. Molten aluminum is poured into the mold to fill the cavity left by the patterns.
Photographed by Michael Herrick, February 26, 2018
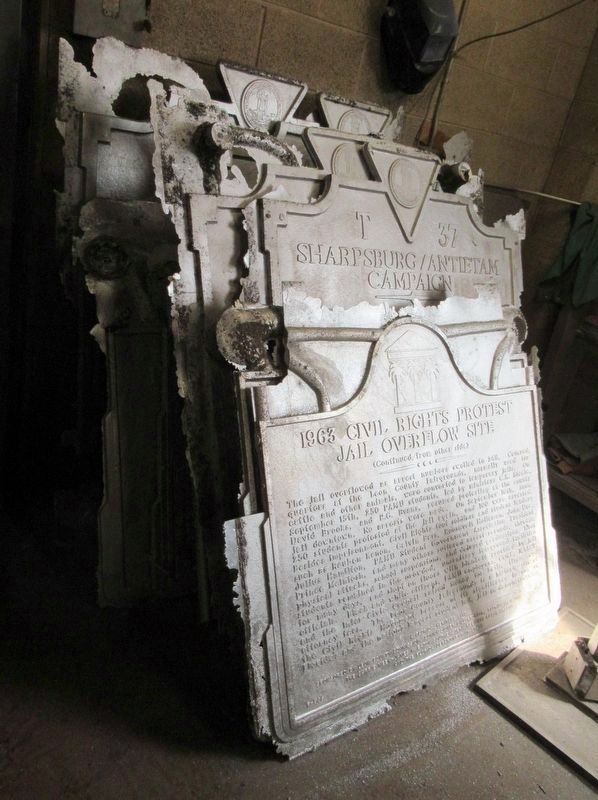
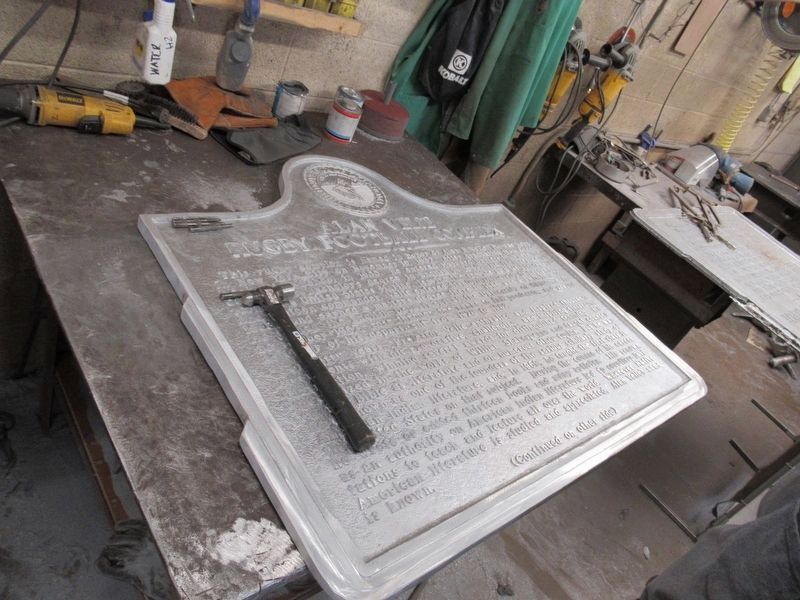
8. Rough Castings
After the aluminum cools, the mold is broken, the casting removed and the sand recycled. After a careful inspection the rough castings are ready for cleanup. These markers are waiting for workers to cut and grind off excess material.
Photographed by Michael Herrick, February 26, 2018
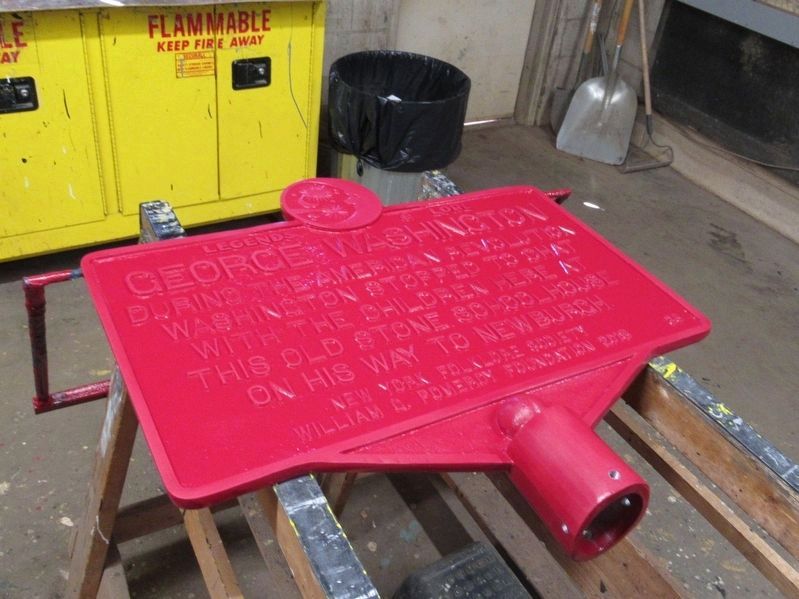
9. Finished Casting
After much careful grinding, the marker is ready for another inspection and then on to painting.
Photographed by Michael Herrick, February 26, 2018
10. Base Coating
A base color of a powder epoxy paint is electrostatically applied. Baking in a high temperature oven cures the coating to a weather-proof finish.
Photographed by Michael Herrick, February 26, 2018
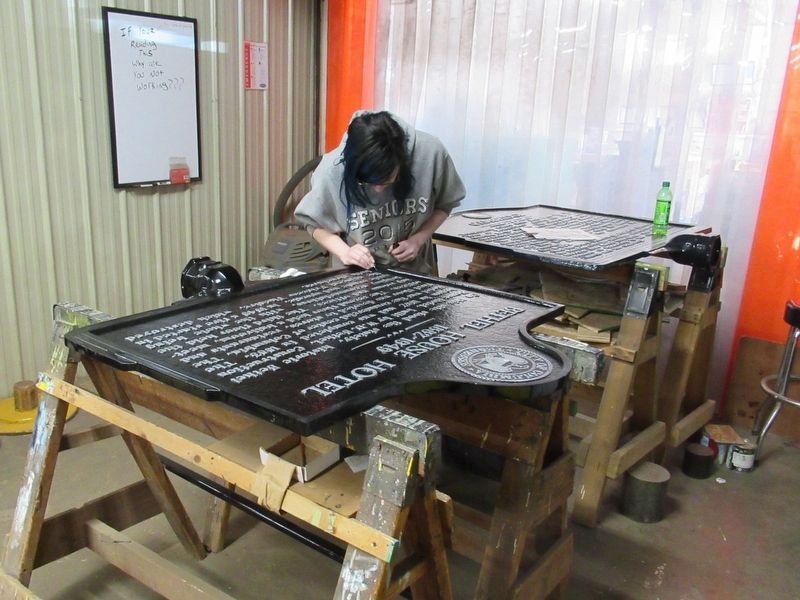
11. Coloring the Letters
A contrasting color is hand painted onto the face of the letters, borders and other elements. This is also cured by oven baking.
Photographed by Michael Herrick, February 26, 2018
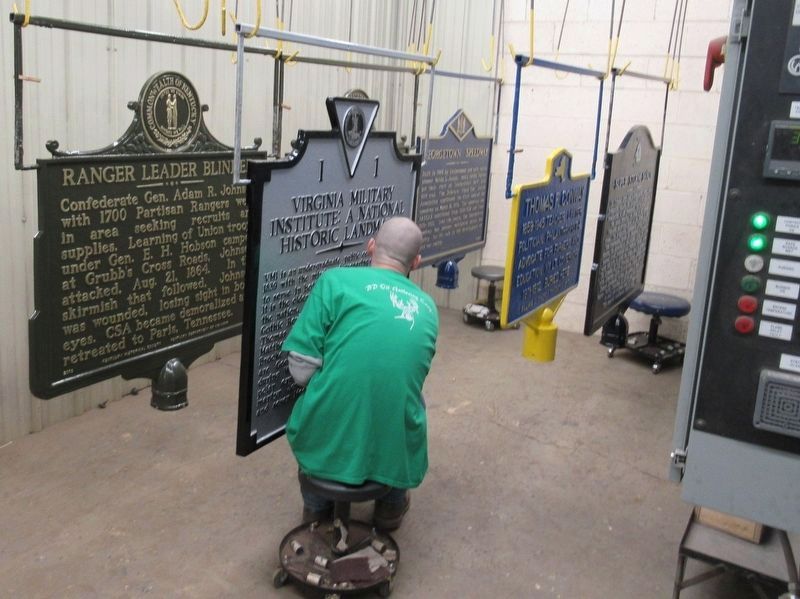
12. Touch-up and Inspection
Here, the markers are inspected once again after the letter color is oven-cured. A clear coating is then applied and cured, followed by a final inspection.
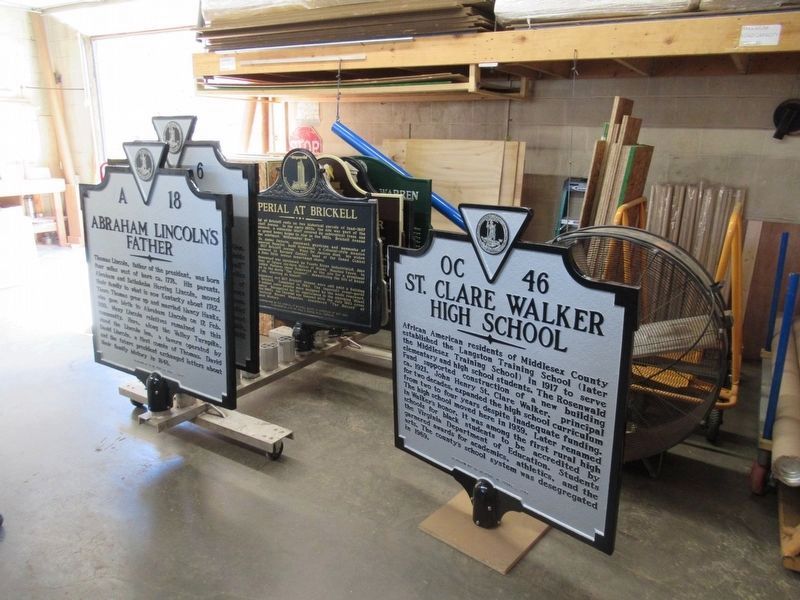
Photographed by Michael Herrick, February 26, 2018
13. Shipping
Finished markers ready for crating and shipping.
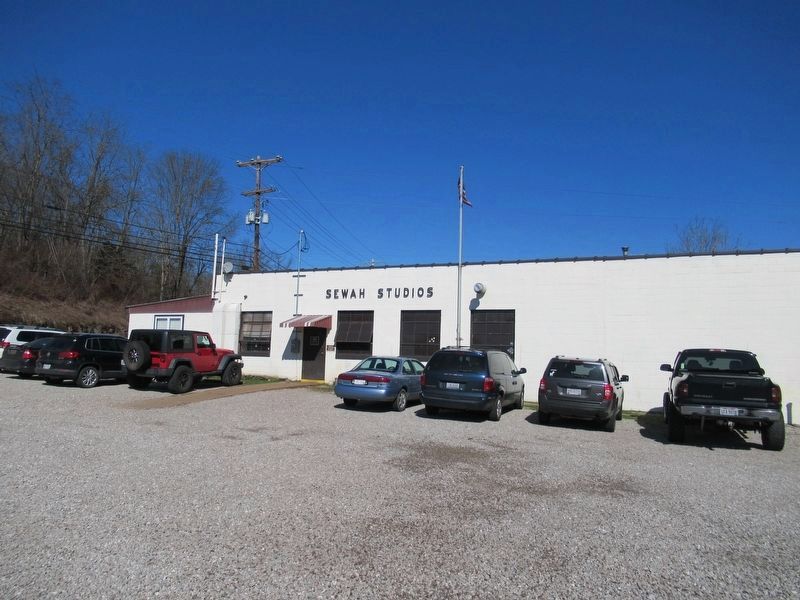
Photographed by Michael Herrick, February 26, 2018
14. Sewah Studios
Credits. This page was last revised on February 14, 2026. It was originally submitted on March 2, 2018, by Michael Herrick of Southbury, Connecticut. This page has been viewed 57,682 times since then and 172 times this year. It was the Marker of the Week March 11, 2018. Photos: 1, 2, 3, 4, 5, 6, 7, 8, 9, 10, 11, 12, 13, 14. submitted on March 2, 2018, by Michael Herrick of Southbury, Connecticut.