
Keyser in Mineral County, West Virginia — The American South (Appalachia)
The Bridge at Remagen
"Worth its weight in gold"
| — | Lieutenant General, Walter Smith | — |

"Rounding the bend in the road, he emerged from the woods and found himself confronted by a breath-taking view - - the prize no man dared hope for - - the Ludendorff Bridge, still intact, spanning the Rhine." This is how Ken Heckler military historian on the scene (and later Congressman and Secretary of State for West Virginia), would describe Lieutenant Timmerman's excitement on that fateful day of March 7, 1945.
Ironically, Timmerman had been born in Frankfurt am Main, Germany, just 100 miles from Remagen. His mother was a German war bride from WWI, and she currently had several brothers fighting in Hitler's Army. But, her oldest two sons were now fighting for the U.S. and one was about to become the first officer to attack across the Rhine since Napoleon. LT Timmerman had just taken command the day before and fate now handed him the chance to make history.
The Bridge at Remagen was still standing on March 7 due to German confusion caused by American aggressiveness. Just three days earlier, Germans had blown two other bridges across the Rhine, one with US soldiers starting across it. Hitler had given orders not
this page online
In the fog of war, such orders give little room for error. Blowing a bridge is one of the toughest decisions in war. There is such finality to it, stranding people on both sides of a large natural barrier. The conflict, the confusion, the hesitation, was all that the US Forces needed.
Following Kesternich, the Germans were on the run. When LT Timmerman (9th Armored Division) and other US Forces (including the 78th) arrived on the hills around the town before some of the retreating Germans, the Germans were in a bind. The Bridge Garrison did not want to destroy the Bridge with thousands of Germans still in need of crossing.
On the American side, there were also conflicting orders. The Combat Commander, Brigadier General Hoge, had been told, "When you get to the Rhine, turn south and hook up with Patton's Army." At first, US soldiers want to shell the retreating Germans on the Bridge, but when Hoge saw the Bridge, his gut told him differently. In spite of his orders, Hoge's American ingenuity told him opportunity
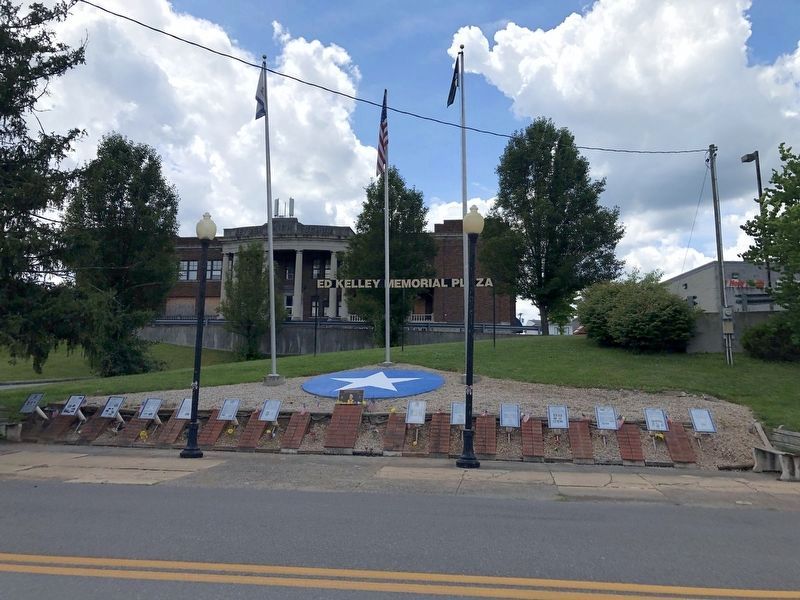
July 12, 2020
2. Ed Kelley Memorial Plaza
Sense of hopelessness collectively felt by German Commander and their staff after Remagen.
For the Germans at Remagen, things went terribly wrong. First, the rapidly approaching Americans pushed the Germans against the Rhine, creating a huge traffic jam of German soldiers, vehicles, equipment, and civilians (including domestic and farm animals, waiting to go across the bridge. Second, the unit occupying the most advantageous terrain in the vicinity of Remagen, the Erpeler Ley (the extremely high mountain directly overlooking the eastern end of the Bridge), was ordered to Koblenz on March 6th. When this incredible oversight came to the attention of Captain Braige, the German officer in charge of the Bridge on the morning of the 7th, he barked orders to the anti-aircraft gun commander to man the Erpeler Ley. Perhaps the dressing down of a "lordly Luftwaffe officer" by an infantry commander affected the speed of the execution, because when the Americans arrived, the observation point remained unmanned.
But most dangerous of all, at 11:00 a.m. when the explosives arrived to be used in destroying the Bridge, there were only 300 kilograms as opposed to the 600 requested, and it was a weaker industrial explosive, not the standard military type. And finally at 11:15 a.m., SS officer unfamiliar with the situation and operations at the Bridge, Major Scheller, replaced Captain Bratge. Though relieved that higher headquarters was now paying attention to his plight. Bratge was devastated to learn Major Scheller did not bring with him the two battalions Bratge thought necessary to defend the Bridge.
German engineers went to work placing the explosives on the Bridge, ensuring there were multiple means to detonate the charge. Bu 11:25, US Forces began attacking in the hills, and had started their descent into Remagen. By 12:50 p.m., Bratge and Scheller could hear US soldiers firing inside Remagen. The explosives were then in place, but Scheller knew several thousand German soldiers still planned to use the Bridge and a valuable artillery unit was now enroute to Remagen. He denied the Engineers request to blow the Bridge.
At 2:00p.m., US tank and infantry fire was beginning to hit targets on the Bridge. When the German Engineers saw the first US helmets, they fired the preliminary charge, blowing a 30-foot crater across the Bridge approach. By 3:00 p.m., US tank and infantry began lining the western bank, hammering the eastern shore with fire. Rumors spread among the US Forces that the Germans planned to blow the Bridge at 4 p.m., increasing the urgency to take the Bridge immediately.
Inside the Erple Tunnel on the German side, the German Engineers told everyone to open their mouths so as to protect their eardrums. Under intense fire, at 3:20 p.m., Major Scheller gave the order to blow the Bridge. The Engineer in charge turned the key, but nothing happened. Frantically, he sent his men out to fix the wiring. They got no further than the tunnel entrance before being turned back by US fire. Finally, one of his men volunteered to run out unto the Bridge and light the primer cord by hand. Back on the western shore, LT Timmerman began to give his men the order to move across the Bridge. Suddenly, a deafening roar blazed through the valley, and the Bridge lifted up off its foundation. The hand detonator had worked.
"Thank God, now we won't have to cross the damned thing," one GI said. Then, as the smoke cleared, to everyone's amazement - - German and American alike - - the Bridge settled back down on its foundations. It was still standing.
General Eisenhower's Chief of Staff
Topics and series. This historical marker is listed in these topic lists: Bridges & Viaducts • War, World II. In addition, it is included in the Former U.S. Presidents: #34 Dwight D. Eisenhower series list. A significant historical date for this entry is March 7, 1945.
Location. 39° 26.386′ N, 78° 58.619′ W. Marker is in Keyser, West Virginia, in Mineral County. It is on East Piedmont Street (West Virginia Route 46) just west of North Davis Street. Touch for map. Marker is at or near this postal address: 31 E Piedmont St, Keyser WV 26726, United States of America. Touch for directions.

Regionally, this marker is in the Eastern Panhandle. It is also in the American South, specifically in the Upper South, in Appalachia, and specifically in Northern Appalachia. Globally, it is in North America, the Western Hemisphere, the Western World, and the Anglosphere. Historically, it finds itself in what was once the territory of the Mississippian Culture.
Other nearby markers. At least 8 other markers are within walking distance of this marker: A different marker also named The Bridge at Remagen (here, next to this marker); a different marker also named The Bridge at Remagen (here, next to this marker); Encircling the Nazi War Machine & German Capitulation (here, next to this marker); The Aftermath of Kesternich / Germans Retreat (here, next to this marker); The Battle for Kesternich (here, next to this marker); The Medal of Honor (here, next to this marker); Jonah Edward Kelley (here, next to this marker); Regaining the Initiative (here, next to this marker). Touch for a list and map of all markers in Keyser.
Credits. This page was last revised on August 25, 2022. It was originally submitted on July 14, 2020, by Devry Becker Jones of Washington, District of Columbia. This page has been viewed 291 times since then and 9 times this year. Photos: 1. submitted on July 14, 2020, by Devry Becker Jones of Washington, District of Columbia. 2. submitted on July 14, 2020.